Branding your Acumatica ERP system is essential to provide a consistent look and feel across your enterprise applications. Customizing logos, themes, color palettes, and reports can enhance user experience and align the ERP interface with your corporate identity.
This guide will walk you through the step-by-step process of branding Acumatica ERP.
Why Brand Acumatica?
Branding your Acumatica ERP instance allows you to:
- Align the interface with your company’s visual identity
- Provide a professional and consistent user experience
- Enhance user trust and confidence
- Supports multi-tenant environments (e.g., test vs. production)
What Can Be Branded in Acumatica?
You can customize and brand the following elements:
- Company Logo
- System Colors (via Themes)
- Reports & PDFs
Step-by-Step: How to Brand Acumatica ERP
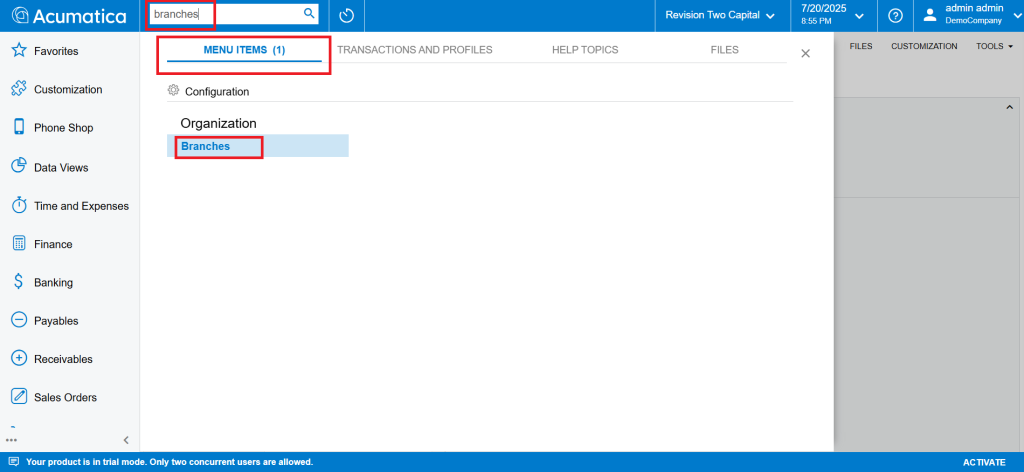
Step 1: Open the Branches Menu
Start by typing the keyword “Braches” in Acumatica Universal search.
Within the “MENU ITEMS” tab, look for the “Organization” section. Under this section, choose the “Branches” option. This is where you can manage information about different branches within your organization.
Step 2: Select the Branch
In the Branches screen, you’ll see the list of branches in your organization. Select the branch to which you want to apply the branding.
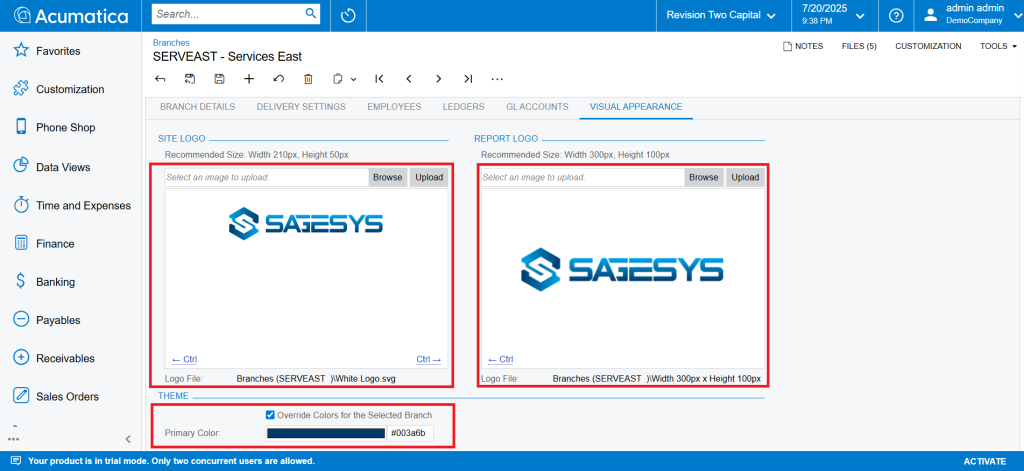
Step 3: Navigate to the Visual Appearance Tab
Once you have selected the branch, navigate to the “Visual Appearance” tab. This tab contains settings related to the branding in Acumatica ERP.
Step 4: Set the Company Logo
In the Visual Appearance tab, find the section labeled “Site Logo”.
Click on the “Browse” button to select the logo file from your computer, then click “Upload”. This will add the company logo to the logo section of the selected branch.
Step 5: Change the Theme
In the Visual Appearance tab, find the section labeled “Theme”.
Tick the “Override Colors for the Selected Branch” option and set the Primary Color. This will apply the color scheme and general UI theme to align with the company’s brand identity.
Step 6: Brand Reports and PDFs
In the Visual Appearance tab, find the section labeled “Report Logo”.
Click on the “Browse” button to select the logo file from your computer, then click “Upload”. This will add the company logo to the Reports and PDF documents of the selected branch.
Step 7: Save the Changes
Finally, make sure to save all your changes.
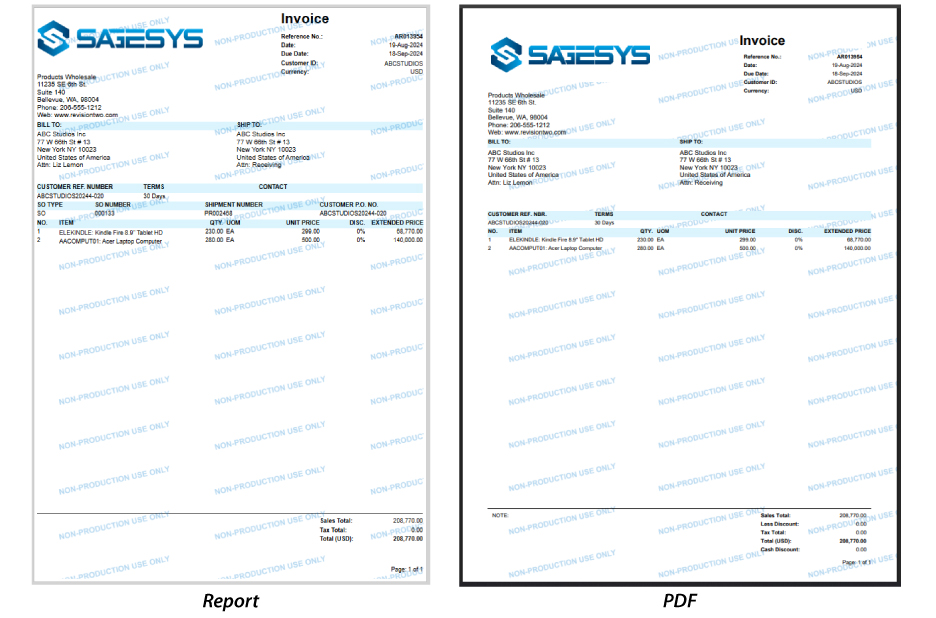
Result

Branded Site
Final Thoughts
Branding Acumatica ERP is a powerful way to deliver a consistent, polished experience for your users and clients. By following these steps, you ensure your ERP environment reinforces your company identity at every touchpoint.